A Culinary Experiment!

Documenting the ups and downs of our first CSA experience...
and our attempt to be more conscious of all things local!
Showing posts with label Green Garlic. Show all posts

Swiss Chard, Scallion and Garlic Frittata

>> Monday, June 28, 2010

Egg dishes are another staple in our household. Because of this, we often try to limit the number of whole eggs we use when cooking. We've discovered that if you replace some of the egg with just whites, you usually don't notice the difference. (I find that it's a lot easier to separate the whites from the yolks if you use a separator - they're really cheap and you can find them at most stores that carry housewares.) If you find that this dish is not flavorful enough, feel free to use all whole eggs. Just lower the amount accordingly...

Frittatas are really simple, and they're great because you can use any combination of ingredients you'd like. I'm a breakfast person, I would eat it for every meal if I could, so to me this is the perfect dinner-time dish. If you ask my sister though, she'd think you were crazy! She doesn't like eating breakfast in the morning, so she'd hate this meal as supper. To each his (or her!) own - you decide for yourself.

I didn't list the amounts of most of these ingredients because we were making it up as we went along, but it really doesn't matter... oh, and the first four ingredients below came from our CSA!
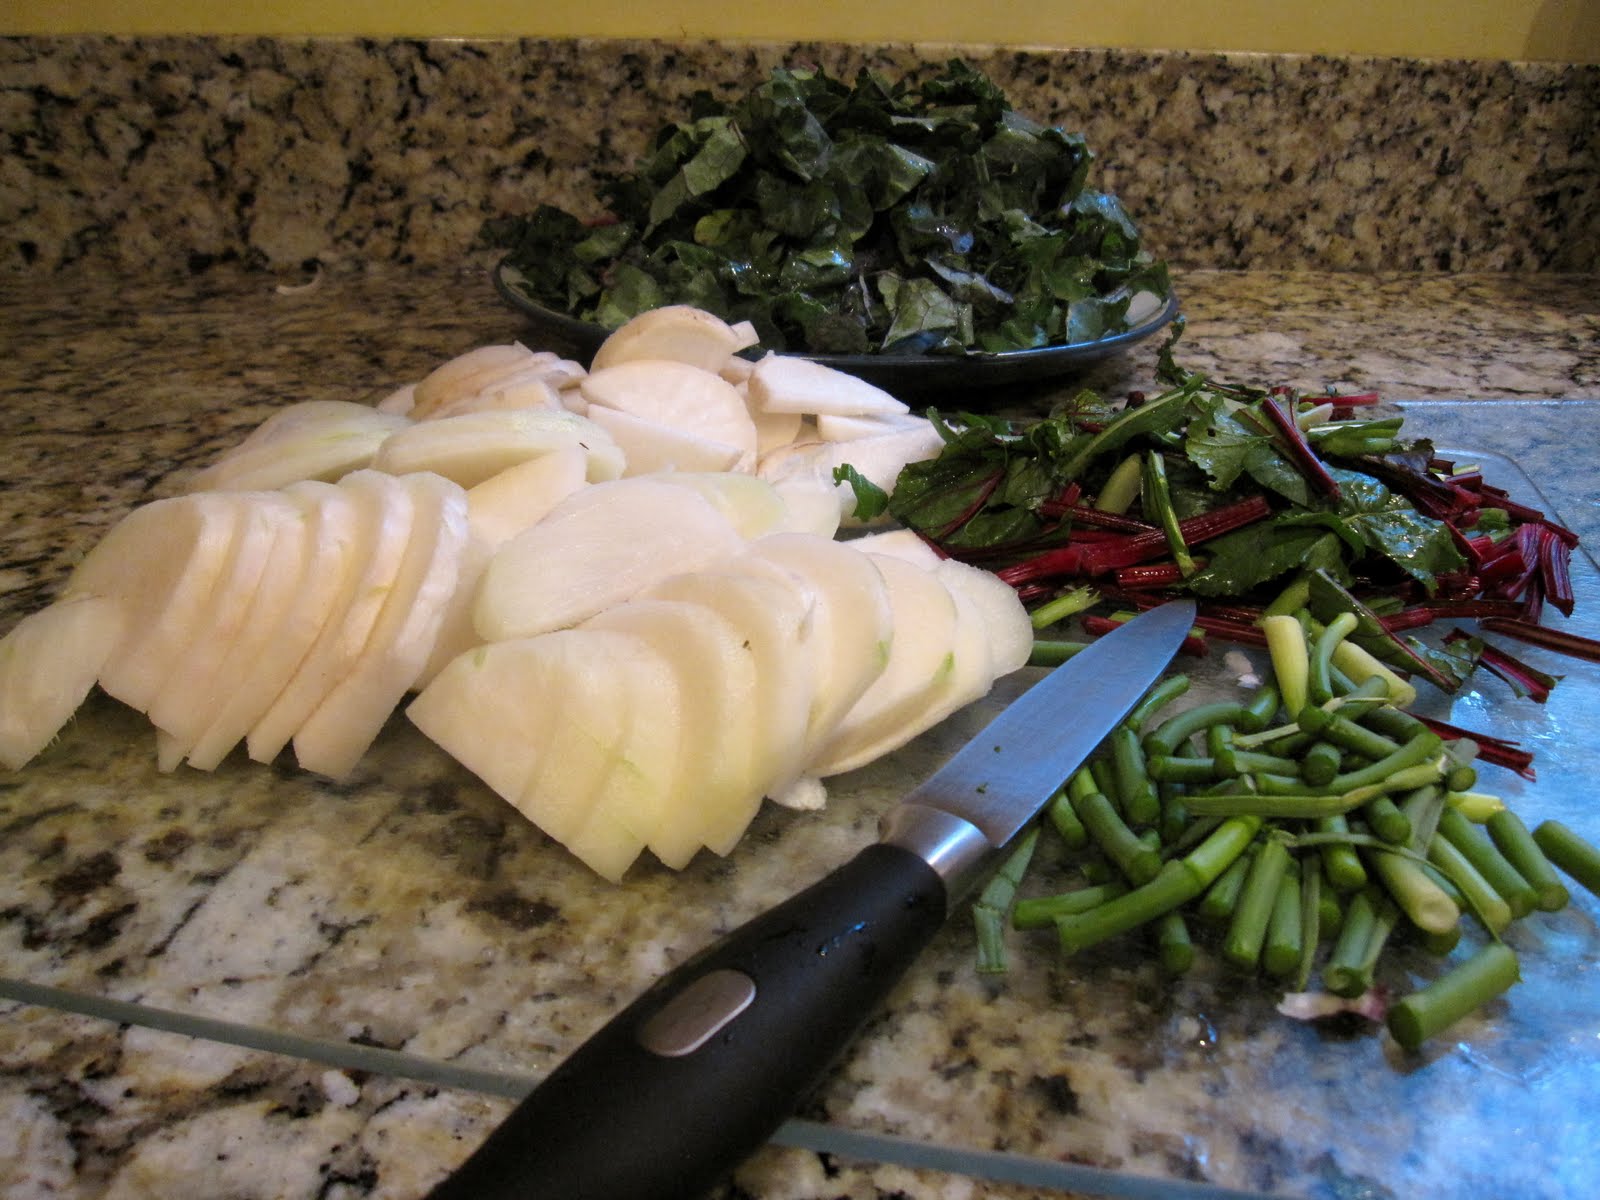

INGREDIENTS:

- Swiss chard, leaves and stems separated and chopped
- Garlic scapes, chopped
- Scallions, chopped
- Parsley, chopped
- Salt and pepper
- 2 eggs plus 4 egg whites
- Skim milk
- Good quality Parmesan cheese

PREPARATION:

1. Preheat oven to 400 degrees. Grease frying pan (we used cooking spray, but feel free to use your favorite kind of cooking oil or butter) and heat to medium or medium-high. Add scallions, garlic scapes and stems of Swiss chard (they take longer to cook than the leaves do). Cook until tender (about 5 minutes). Add salt and pepper to taste.


2. Combine eggs, egg whites and skim milk in a small bowl and whisk until mixed.

3. Add Swiss chard leaves and parsley and cook until the greens are starting to wilt. Add egg mixture to frying pan. Cook for 1 or 2 minutes or until egg begins to set.


4. Transfer to 9 in. pie plate (unless using oven-safe pan, in which case you can just place it directly in the oven). Cover with parmesan cheese and bake for 10 minutes.


5. Serve with English muffins or toast. Enjoy!


This dish had a bit of a "woodsy" flavor that would definitely have been enhanced with the addition of some mushrooms - the whole time we were eating it, I kept wishing I had some in the house!

My rating: 9/10
Dan's rating: 8/10

Read more...

Tilapia with Sesame Greens & Garlic Scapes

>> Friday, June 25, 2010


Our kitchen is finally unpacked enough that we could cook a real meal, and last night's dinner was great!

Sesame Broiled Tilapia (adapted from AboutSeafood.com)

INGREDIENTS:

- 1 lb. fresh tilapia fillets
- 2 tbs. butter, melted
- 1 tsp. fresh lemon juice
- 3 tbs. sesame seeds
- 1 tbsp. of soy sauce (our addition to the recipe)

PREPARATION:

1. Combine melted butter, lemon juice and soy sauce in a shallow dish and dip the fillets in the mixture. Place on a lightly greased ovenproof pan.

2. Broil under high heat about 2 minutes each side, basting with the butter/lemon mixture several times during the cooking process.

3. After the final baste, top fillets with sesame seeds. Broil an additional 1-2 minutes until the seeds are golden brown.


Sesame Greens with Garlic Scapes
(from Red Fire Farm)

INGREDIENTS:

- 1 bunch turnip greens
- 2 turnips or kohlrabi
- 1 bunch swiss chard (we used kale instead)
- greens from 1 bunch of beets
- 4 garlic scapes 1/8 cup oil
- 2 tbs. sesame oil
- 2 tbs. sesame seeds
- 1 tbs. tamari (soy sauce)
- 1⁄4 tsp. cayenne (opt.)


PREPARATION:

1. Chop greens, removing stems and chopping finely (they need more time to cook so if you want to use them you just have to start them earlier). Thinly slice turnips and cut scapes into 1 inch pieces.


2. In a wok or similar skillet, heat oil until hot and toss in turnips, scapes, and any stem pieces. Cook for 5 minutes.


3. Add beet greens and tamari, cover and cook another 5-10 minutes, stirring occasionally.

4. Add cayenne, sesame seeds, swiss chard, and turnip greens and cook until greens are wilted.


My rating: 8.5/10
Dan's rating: 8/10

One final note about fish - please do your best to buy sustainable seafood whenever possible! Click here to download a great pocket-sized regional list that you can bring with you to the grocery store (from the Monterey Bay Aquarium). They also have an IPhone app, which you can access here.

Read more...

Green Garlic

>> Monday, June 14, 2010

If you've never had green garlic (a.k.a. garlic scapes), you MUST go and find some right now. Granted, I love garlic and put it in most of the recipes I make, but I would still recommend green garlic to just about anyone. As you can read in the description from www.wisegeek.com below, green garlic has a much more milder flavor than your average garlic...

Green garlic is young garlic which is harvested before the cloves have begun to mature. The resulting vegetable resembles a scallion, with a deep green stalk and a pale white bulb.

When garlic is grown normally, it is harvested when the lower part of the stalk visible above the ground starts to turn brown. The bulb of the garlic has differentiated into garlic cloves, and it is cured so that it will last in storage. Typically, garlic is harvested in the middle of summer. Green garlic, on the other hand, is harvested before the plant is mature. The stalks are still totally green, usually around one foot (30 cm) long, and the bulb resembles that of a green onion, rather than a segmented head of garlic.

The flavor of green garlic is still garlicky, but is much more mild with less of a bitter bite. When cooked, the green garlic sweetens, lending a new layer of depth to a dish.

Read more...

Formula for Our Favorite Stir-Fry

We have several go-to recipes in our cooking arsenal, and stir-fry is one of them. I'd say we probably make it about once a week or once every couple of weeks, so we've gotten pretty good at it. We never really make the same recipe twice, because it depends a lot on what veggies we add and the liquid we use to cook it... here's how we did it tonight!

Ingredients (definitely feel free to mix it up!):

Zucchini
Yellow Squash
Red Pepper
Green Pepper
Bok Choy
Green Garlic
Chives (from our garden!)
Cooking oil
Ken's Lite Asian-Sesame Dressing
Pineapple juice
Sriracha (Thai hot sauce)
Low-sodium soy sauce
White Rice

1. Cook rice according to package directions. (We normally use brown rice because I don't particularly love white rice, but we're moving this week and our pantry is more limited than usual. If using brown rice, be prepared for a longer cooking time!)

2. Drain tofu and slice into 6 even-sized slices. Press tofu between 2 baking sheets lined with paper towels. Use a heavy object to apply pressure (there will be a fair amount of liquid displaced from the tofu). We used a watermelon!

3. Cut each tofu slice into approximately 15 cubes, for a total of 90. Heat oil on HIGH and cook tofu, stirring occasionally until golden brown. Add whatever seasoning you'd like while tofu is cooking. We used soy sauce, but you could just use salt and pepper.


4. Chop vegetables and set aside (Dan tends to cut our stir-fry veggies into the shapes you find them in restaurants, but you can really do it however you like).


5. Once tofu is browned, remove from pan and set aside. Add more oil to the pan and cook vegetables (start with veggies that take longer, such as carrots or peppers and then move on to those that are softer/have shorter cooking times).


6. While the veggies are cooking, add flavoring liquids to taste - we usually use a combination of soy sauce, Asian-Sesame dressing, Sriracha (Thai hot sauce), and pineapple juice. Again, this really depends on your personal preference. If you choose to use Sriracha, be aware that a very small amount goes a long way - it's quite spicy!


5. Combine the veggies with the rice and serve!


My rating: 8.5/10
Dan's rating: 8/10

Read more...

Green Garlic, Dill, and Fresh Vegetable Quiche

>> Saturday, June 12, 2010

Dan made brunch this morning, and it was AMAZING! I tried to recreate the recipe here, but it's somewhat approximate. I don't think it really matters though - feel free to tweak it to your own tastes!


Adapted from Better Homes and Garden New Cookbook, Bridal Edition^
Serves 6

Ingredients:

1 pre-made pie crust*
1/2 red pepper, chopped
1 cup artichoke hearts, chopped
2 tbsp fresh dill, chopped**
1 green garlic stalk and bulb, chopped
3/4 cup feta cheese
1/2 cup skim milk
6 egg whites
Salt and pepper to taste

1. Preheat oven to 325 degrees.

2. Combine all herbs and vegetables in a medium bowl.

3. In a separate bowl, scramble egg whites and milk. Add 1/2 cup feta cheese, salt and pepper. Add to herb and veggie mixture and mix gently.

4. Pour into pie crust. Add the rest of the vegetables and then top with remaining 1/4 cup feta cheese.

5. Place pie crust on a baking sheet to catch any drips. Bake approximately 45 minutes, until crust is golden brown and a knife inserted into the center comes out clean.

^ We got this cookbook for our wedding 2+ years ago, and we LOVE it - I would definitely recommend it to newlywed couples. It's got tons of great tips and basic recipes that you can make your own. Our copy is well-used!

* Yes, I know some of you are probably cringing at the idea of using ready-made pie crust, but I find that it actually tastes better than some of the homemade crusts I've made. It's also a lot faster!!! :) Oh, and the New York Times even said it's alright!

Maybe next time I'll try making my own crust, but in the meantime, we're partial to Oronoque Orchards Deep Dish crusts - they're kosher, so there's no lard! You can find them in the freezer section.


My rating: 8/10
Dan's rating: 8/10

** we're not positive that he used 2 tbsp of dill, but the amount that we did use was a little overpowering - next time we'll cut it back just slightly.

Read more...

Blog template by simplyfabulousbloggertemplates.com

Back to TOP